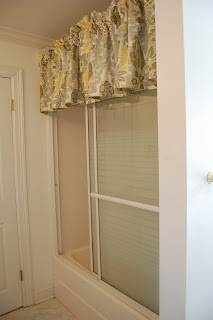
Search This Blog

Monday, April 5, 2010

Kate's Baby Bedding

I will start off by saying baby bedding is something you only make for someone you really love. And so far only my little niece, Kate Hinderberger, qualifies. My sister saw some bedding she loved, ironically called Kate's Collection, on Serena&Lilly.com (http://www.serenaandlily.com/Bedding/Bedding-Nursery-Kate). We decided to duplicate it for less than half the cost that it retailed for, and I must say I think I like our version better!

I did not take step by step photos, because it was just too involved, but I will include the photos I did take.

First, what we were trying to replicate, which retails for $389...


Now here's what I created. I sewed everything but the crib sheet. I even had to make the pink cording for the bumper pad, so all the pinks would match. It was all very tedious but so worth it in the end!

Friday, March 19, 2010

Yet Another Reason to go to Target and Spend Money


Here's another reason to go to Target and spend my husband's money...like I needed one!! I love Target for a myriad of reasons, I love the option of getting a white chocolate mocha to enhance my shopping experience (most times I don't get one, but I like to know I can); I love that it's similar to Wal-Mart in the selection but you don't have indignant workers to deal with; I love going through their home decor aisle, though it's not nearly long enough; I love the little sandals I bought Hilton for $14.99.

But I've never bought clothes there. I was always the girl who could compliment another girl's jacket and ask her where she got it from and she'd say Target, and then I would muse that I've never found anything cute there, then I would admit to myself it's because I've never really shopped through their clothes. This Monday was no different, I was just minding my own business walking by the women's department, and I saw this terrific little aviator jacket and I just had to have it. It came in off-white, black and brown; I thought the brown looked the best by far, but unfortunately they didn't have a medium. I decided it wasn't meant to be, and left the store. Two days later, however, I was in there again and would you believe they had my size?! Well that, my friend, is just destiny! For $29.99 my wardrobe was a new wave of trendy!

I looked for a link online, because I believe in sharing great finds, but I guess these are only in stores. Good luck!

Saturday, March 6, 2010

Before and After on Accessories

There's a reason men are from Venus and women are from Mars. Or, wait, scratch that and flip it. The cliche killer strikes again, signed Yours Truly.
Anyways, the point is that I had initially hung this painting over my couch, off centered of course. My dear husband asked me daily if I was aware I hadn't "gotten it right." I told him I knew it was off center, but I was in search of the perfect oval baskets to put to the side of the picture and not to worry. He shrugged and sighed and asked me what that was going to cost him. :)
I never did find the perfect oval baskets. But I did find these really cool glass bowls that I could fill up with fake fruit from Target.


There were four problems with this arrangement, however. 1) When men would sit on the couch, only men for some reason, they'd really sink into it, and bang their head on the glass. 2) My husband was now certain that I was crazy. 3) It would only be a matter of time before my little toddler could climb up on the couch and do goodness knows what with this glass fixture. 4) Given the amount of color already in the room (not depicted from this shot) it was hard for the eyes to have something to "settle on." It was just a little to busy.

So, I took to the streets again to find these baskets. Unfortunately, they were gray and so I had to buy some spray paint and make them the brown they should have been. They weren't oval, but they were close enough and Lisa-approved.

Saturday, January 9, 2010

Bathroom Makeover

"Plain Jane"

I think everyone can agree that this bathroom needs color like a bird needs feathers. So you can see the before. Now here's the after...

"Hot Mama"


Today, my mother's guest bathroom got a little makeover. I'd mentioned the fabric that didn't work for any of the bedrooms, but fit perfectly for the bathroom...well, this is it my friend.

And this is how I did it.

1. Measure the window and the shower.
a) Window - I measure from the bottom of the ceiling trim to the bottom of the window sill and add 4 inches (2 inches for "turn under" at the top and bottom...turn under is what makes it pretty). For the shower valance I measure the length of the tub (I think it was 58" and the distance between the top of the shower door and the bottom of the ceiling trim and add 4"). Since the valance needs to fold, tucker, etc, I take 58" and multiply it by 1.5 to get ~87". That's just a rough formula I use if I don't want it to lay flat, but want it to have body. Figure out your yardage from there.

2. Whatever yardage you buy in your fabric, buy the exact same amount in your curtain lining. I usually just use an off-white cotton, it's about 3.99/yard at Hancock's. You can also use blackout lining, which I sometimes like in bedrooms if you want it dark, but not in this bathroom which is light and airy.

3. Roll out your fabric and cut it. I started with the drapes. Since this window was so small, only 22" wide, and the fabric was 54" wide, I decided to just split one standard width in half and thereby reduce the panel width/fullness by half...which conveniently is a terrific way to reduce the cost of treating that window by half. After I cut the fabric, I roll out the liner fabric and cut that right over it.


4. For the valance, I knew I'd need to sew two widths together (which is more than the 87" I'd mentioned in Step 1, but I didn't mind overshooting). Since there's a pattern on this and it's not a solid, you must sew them together carefully so there's not an obvious gap in the pattern. As you can see in the first picture, lay the two widths side by side to where you can't tell where one ends and the other begins. In the second picture, pin the two pieces from top to bottom. Sew it up, and then check your work!


5. Next step...IRON the seam! I always just keep my ironing board out and the iron on whenever I'm sewing drapes. My husband always thinks I'm about to iron his clothes, but what fun would that be? Sucka'!


6. Repeat the same step for the lining. This is much easier since there's no pattern to line up. But put like sides together (if you can tell the difference in the sides!) and sew it up! Don't forget to iron this out too!


7. Lay the liner on top of the backside of the fabric. It's time to put these two together! Once I get the liner on straight, I put several pins in place to hold it in place securely since this is such a long piece of fabric.


8. As always, you start on the sides. Fold each side in 1" and pin. Then iron each new pleat. Remove pins and fold each side over again 1". (You are taking 4" total off the total width of the fabric, but it gives it a marvelously finished and professional look). Observe and agree...
* Note that this is only after turning the side over once, I got lazy and forgot to take the second picture, but you can refer to other posts to see what it looks like.


9. After both sides have been turned under and sewn down, it's time to tackle the bottom of the valance. Turn over, pin and press, repeat. Sew.


10. It's time now to sew the rod pocket. It might have been better to do this first, then hem the bottom, but I started this project at my house, but didn't trust my mother's measurements over the phone. So I wanted to complete as much of the project as possible before I went out there.
Excuses aside, when it's time to sew the rod pocket, you need to measure the circumference of the LARGEST part of the rod. I rudely capitalize because I once made the error of measuring the circumference of the shower rod itself, and sewed about 7 fee of stitches just to realize I couldn't fit the rod pocket over the shower rod. The ends were to big, and they weren't like the finials from a curtain rod that can be unscrewed...so therefore I was, ahem, screwed. I started unstitching that beast of a valance and was done two hours later.

Here's the formula for a round rod pocket --> Measure the circumference of the widest part of the rod, divide in half, and add 1/2 inch. Say the circumference is 5 inches; half of that is 2.5 inches, plus .5 is 3 inches. If you want a ruffle, and of course I did, add that measurement too. 3 inches + 2.5 inches (ruffle). Take into account about an inch for turn-under and that's the amount of the top edge you need to fold down.


11. Now, as you are pinning the edge under, you should constantly be measuring from the top of the valance to the very bottom of the valance to double-check that it's consistently the same length. You cannot assume that you cut your fabric perfectly straight, unless you are working with a plaid or striped pattern (which are favorites of mine now, for those very reasons). I typically pin, flatten out the rod pocket, measure from the top to the bottom, then re-pin if needed.


Once you've turned under your raw edge and sewn it, you need to a parallel seam for the ruffle. I wanted approximately a 2.5 inch ruffle, so I pinned it and then inserted the rod just to make sure I was ok. As you can see, there's plenty of room.


12. Sew your final seam and hang that beauty up.

Thursday, January 7, 2010

Nuggets

Got my hands on an Anthropologie catalog today, and fell in love.

First things first, every woman loves purses. They always fit and they're never snug.


I tend to stay away from strapless dresses for the most part, something about turning 26...does that make me old?? Anyways, they paired this with a grey cardigan (I think) and it looked marvelous!


Does this remind anyone of Audrey Hepburn's outfit in My Fair Lady - the scene where her hair is up and she and Professor Higgins get into a huge fight? And she's singing "...and they march Henry 'Iggins to the wall? And they king will say 'Eliza, sound the call?!" Anybody? Anybody????


The model that had this on had perfect arms and a pristine tan. What doesn't look good on that?


Then, in my latest Lucky magazine, I saw this dress. I must have it. Will, are you reading this???

I will even be so kind as to include the link! (http://www.andrewmarc.com/marcnewyork/index.php/dresses/newarrivals/marcie.html)


Terrific Christmas Gifts for Kids

I will digress from home decor for a while to talk about my absolute bar-none favorite hobby/interest/calling, and that is being a mom to my one year old son. He is intelligent, zany, witty, hilarious, thoughtful, intense and hysterical - and he's only 1! He's just getting started. Hopefully he can be humble as he grows up, despite the sweet nothings I tell him all day long.

Now that Christmas is over, the dust has settled, and my husband and I realize we need to move to accommodate all of these toys, I thought I might share some of the really terrific gifts we got that our 1 year old son has loved playing with. Whether you have children or have a niece or nephew's birthday coming up and aren't sure what to get that is impractical and fun (because who wants socks for their birthday...but what 1 year old could have enough?), these are some that have worked for us!

The Tickle Monster Laughter Kit is my favorite book now. There are some books that get a bit boring to read, but this book has really clever and funny rhymes, and I haven't gotten tired of donning my tickle monster mitts and tickling him yet!


Another favorite has definitely been the Little People Animal Farm. Our little boy got this Christmas morning and fell instantly in love. Plus, as you can see from the second picture, the little sheep (and the pig!) are so fat and rotund, you can't help but love them too!


Last but not least, his Aunt Ginny gave him Pound a Peg. He loves playing with the pegs and takes personal offense when they are actually placed in the holes (where they should be). He also is intolerant of blocks being stacked on top of each other, or the goat from the Little People Animal Barn being put on the roof. He has his quirks, but he gets them honestly.


And finally, the Radio Flyer classic spring horse is a must have (space!) toy for any boy, right? Well, that's what my mom believes, and now our kiddo is a proud owner. By the way, that is not my child on the horse. I think it will be a while before he has the coordination to ride, but until then, it looks really cool.

Wednesday, January 6, 2010

No Bathroom is Complete without a Valance and some Drapes

Now that I have covered every window in my house, I kindly informed my mother that she needed window treatments as well. She's lived in the house she and my dad built for over 10 years, and they've given every indication they'll never move, so to me it's worth the investment of some drapes. Mind you, I'm not the one "investing," but my labor and 2 cents are free and I haven't pulled out my Bernina in over two weeks...and she's gettin' lonely!

So after going to the fabric store and picking out about 10 fabric samples, I drove them out to my parents' house and held them up against the wall. I recommend always(!) doing this, because even though you think you remember what shade of yellow that guest bedroom is, it's usually a bit off and fabrics are weird about not wanting to match, even though you try to convince them they're destiny is to be cut up, pinned, needled, ironed and hung for the rest of their existence in your bedroom. What fabric could resist such sweet talk?? So I made the 30 minute drive with 3 "for sure" fabrics that I'd already picked for each room. I made my sister hold them up against the wall so I could take a "step back" and soak it in. To my utter shock, almost none of them worked! I then had my mother hold them just in case it was my sister making the master bedroom's tan walls a little too peachy, but alas, I am back to the drawing board and am going back for more samples.

However, this is your golden nugget for the day.... "If you are going to spend them money and the time sewing (because it's surprisingly not cheap), you don't just need to like it, you need to LOVE it!"

That is my rule. Otherwise, the $100 bucks you spend making 9 inch drape panels is for naught, and you'd be better off saving it....wait, that's not my rule...you'd be better off going to Hobby Lobby.

On a positive note, the 30 minute jihad to the country was not entirely for naught. I realized one of the fabrics I'd chosen, while not right for the guest bedroom, was simply made for the bathroom. To give you an idea of what I am planning on, here are some pictures of drapes (with trim, of course!) and a valance I made for my guest bathroom. Please excuse the pink tile, but by the time I can afford to replace it I plan on moving! :)