I only rave about products that I think really deserve it. And this is the most amazing hair clip that you need to know about. I have long incredibly thick hair. Nothing short of a reinforced pony tail holder can hold my hair back...except for this. I bought this hair clip in Austin while visiting my sister when I was in college.
Nordstrom's sells them and you can read the reviews on the hair clips there. People with really fine hair and thick hair love them alike!
http://shop.nordstrom.com/s/ficcare-maximas-hair-clip/2941274?cm_cat=datafeed&cm_ite=ficcare_%27maximas%27_hair_clip:188708&cm_pla=hair_accessories:women:hair_accessories&cm_ven=Froogle&mr:referralID=NA&mr:trackingCode=A1950868-1968-DF11-9DA0-002219319097
Here is the actual company's website.
http://www.ficcare.com/Products.aspx?collId=1
Sunday, April 17, 2011
Monday, April 4, 2011
My Shopping Picks
My top 3 fashion picks this week were selected because summer feels so close, everyone needs a good pool-side dress, and I had a 20% promo coupon and free shipping. I'm such a smart shopper! :) And you can be too!
Okay, number one is from Piperlime and is one of Rachel Zoe's top picks.
Number two is also from Piperlime, by Ella Moss.
The final fashion pick I owe exclusively to Sarah. When I walked into her house, I immediately noticed these fabulous sandals sticking out from under her jeans. Upon closer inspection, I could see a great attention to detail by Sam Edelman, like a fabulous gold zipper in the back, the perfect size wedge for a mom of two...and it's just perfect for summer!
Okay, number one is from Piperlime and is one of Rachel Zoe's top picks.
BCBGeneration Double Tank Dress
| http://piperlime.gap.com/browse/product.do?cid=47898&vid=1&pid=862836&scid=862836002 |
Number two is also from Piperlime, by Ella Moss.
Ella Moss Exclusively for Piperlime Stripe Maxi Dress
| http://piperlime.gap.com/browse/product.do?cid=66508&vid=1&pid=860060&scid=860060012 |
Nordstrom's Sam Edelman 'Eva' Sandal
| http://shop.nordstrom.com/s/sam-edelman-eva-sandal/3134866?origin=keywordsearch&resultback=196 |
Thursday, December 9, 2010
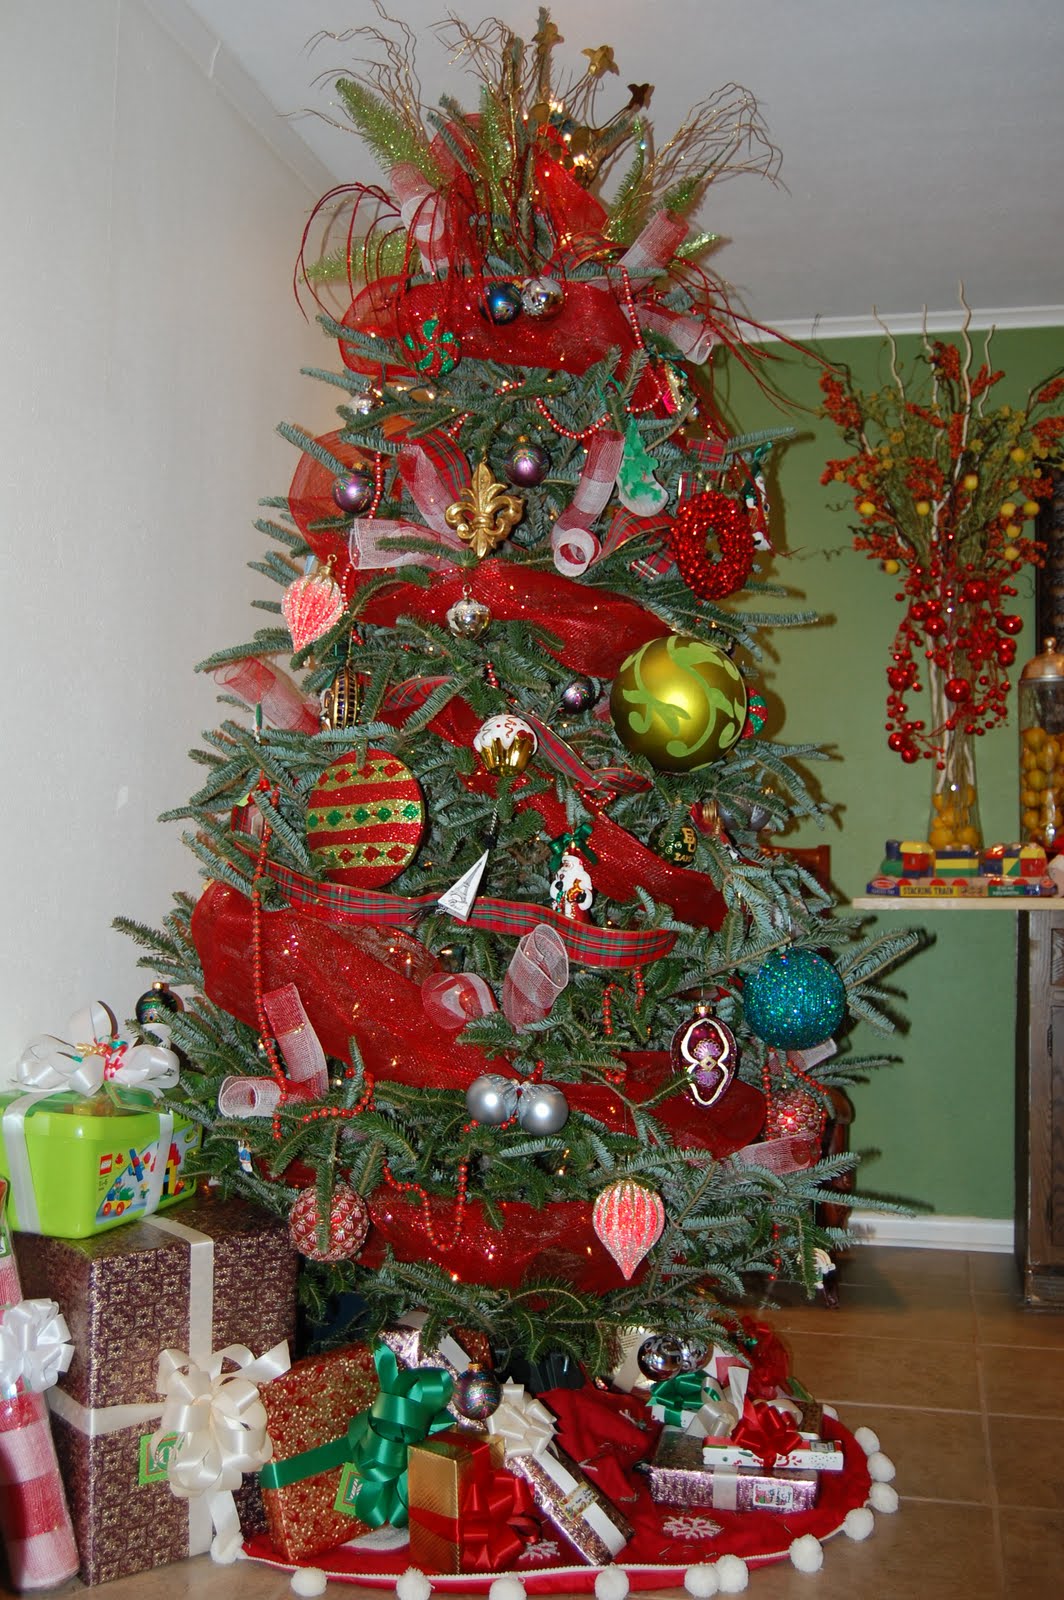
Christmas Tree 2010
Lisa came by yesterday afternoon on her lunch break and helped me decorate my tree, b/c that's the kinda gal she is. When she left, it looked amazing! Lisa has taught me to never be afraid to go crazy, to make your tree fun, to always showcase your child's handmade ornaments, and to use big ornaments in odd numbers.

I got this crown from Red Door, and I stuffed it with lights to give it a regal glow.

I know Clyde won't be with us until March 1st, but I couldn't resist hanging his stocking too! As much as I feel him kicking, I feel like he's here already!

And the buffet. Love it!
I got this crown from Red Door, and I stuffed it with lights to give it a regal glow.
I know Clyde won't be with us until March 1st, but I couldn't resist hanging his stocking too! As much as I feel him kicking, I feel like he's here already!
And the buffet. Love it!
Monday, December 6, 2010
Christmas Wreaths
It seems everyone is making decorator Christmas trees and wreaths with floral wrap lately. I had to jump on board b/c they're so inexpensive and fun! Inspired by a friend of mine, who lead me to this website tutorial on how to make the wreaths I just jumped in and got started - http://blog.mardigrasoutlet.com/search/label/Wreaths
The first wreath I attempted was at my mother's house on Thanksgiving. It took me just a few minutes. The technique isn't hard, it just takes time to get comfortable with the "finessing" the floral wrap requires. I didn't like the green ribbon I intertwined over the floral wrap, but it's all I had. (I am realizing how desperately my mom's front door needs re-staining!! Oooh wee!)


Inspired by a wreath at the Red Door, I tried to model my next wreath for my own front door after it. This is where it can get expensive. The two strands of garland were $20, which I really wouldn't recommend paying, but a friend thought it would look nice and picked it up for me, and I didn't want to bother returning it. Plus, I do love the garland, just not $20 worth.
Red Door's wreath: (which retails at $230)

My wreath: (In the first pic, I had not added the garland yet)

The first wreath I attempted was at my mother's house on Thanksgiving. It took me just a few minutes. The technique isn't hard, it just takes time to get comfortable with the "finessing" the floral wrap requires. I didn't like the green ribbon I intertwined over the floral wrap, but it's all I had. (I am realizing how desperately my mom's front door needs re-staining!! Oooh wee!)
Inspired by a wreath at the Red Door, I tried to model my next wreath for my own front door after it. This is where it can get expensive. The two strands of garland were $20, which I really wouldn't recommend paying, but a friend thought it would look nice and picked it up for me, and I didn't want to bother returning it. Plus, I do love the garland, just not $20 worth.
Red Door's wreath: (which retails at $230)
My wreath: (In the first pic, I had not added the garland yet)
Friday, October 29, 2010
Applique
So I am in love with children's clothing brands like Anavini, who produce these adorable applique t-shirts with cute designs.

The only problem with them is that they are really expensive. Like $36 for a t-shirt kind of range. With the holidays coming up, I decided I need to master this sewing skill! So off I went to Hobby Lobby, who had surprisingly cute choices of applique for children's clothing, as well as well-priced t-shirts at $2.99 (the appliques were $1.99). Wal-Mart also has good prices on the Garanimals t-shirts, which are extremely soft, for $3.50. This is a great idea for gifts that can be "homemade" but not too homemade, if you know what I mean.
Ok, so here are some pictures of the two shirts I've done below. An exciting note about the first shirt: We're invited to a one year old birthday party next weekend for the daughter of a good friend. I'd already purchase a cute little pillow pet, but when I saw this owl applique with a pink shirt, I knew fate was stepping in. The owl applique looks just like the birthday part invitation!! So for around $5, I am throwing it in with the gift, and that will hopefully make both gifts more memorable!


I made the second shirt as a gift for a birthday party I am going to this Saturday (even though I showed up last Saturday mistakenly! haha! thankfully it is a dear friend who would never make fun of me!). His name is Perry and I think this will be adorable on him. Suzanne and I are mostly just excited that I can do the applique, as we both like it.


Technique: Directions are on the back of the applique packet you buy. First I put the shirt on the ironing board and placed the applique where I wanted it. Then I put a thin white cloth over it, and held the iron over the patch for 15-20 seconds. Do not use steam (it says). Then I turned the shirt inside out and ironed it from the back side (with the press cloth over it) for 20-25 seconds. That will keep the applique in place for a while, but not permanently. To make it permanent, you have to sew it on.
Use a color thread that you think will compliment the entire applique. I have seen more complex Anavini appliques that change thread, but this was my first one and I just didn't feel like it. I used a zig zag foot which allowed me to see what the heck I was doing as well as a very short zig zag stitch (experiment before actually starting). Then I slowly stitched around the applique. The little curves and feet can be especially tricky, so just go slow and be careful. Remember, slow and steady wins the race! :)

The only problem with them is that they are really expensive. Like $36 for a t-shirt kind of range. With the holidays coming up, I decided I need to master this sewing skill! So off I went to Hobby Lobby, who had surprisingly cute choices of applique for children's clothing, as well as well-priced t-shirts at $2.99 (the appliques were $1.99). Wal-Mart also has good prices on the Garanimals t-shirts, which are extremely soft, for $3.50. This is a great idea for gifts that can be "homemade" but not too homemade, if you know what I mean.
Ok, so here are some pictures of the two shirts I've done below. An exciting note about the first shirt: We're invited to a one year old birthday party next weekend for the daughter of a good friend. I'd already purchase a cute little pillow pet, but when I saw this owl applique with a pink shirt, I knew fate was stepping in. The owl applique looks just like the birthday part invitation!! So for around $5, I am throwing it in with the gift, and that will hopefully make both gifts more memorable!
I made the second shirt as a gift for a birthday party I am going to this Saturday (even though I showed up last Saturday mistakenly! haha! thankfully it is a dear friend who would never make fun of me!). His name is Perry and I think this will be adorable on him. Suzanne and I are mostly just excited that I can do the applique, as we both like it.
Technique: Directions are on the back of the applique packet you buy. First I put the shirt on the ironing board and placed the applique where I wanted it. Then I put a thin white cloth over it, and held the iron over the patch for 15-20 seconds. Do not use steam (it says). Then I turned the shirt inside out and ironed it from the back side (with the press cloth over it) for 20-25 seconds. That will keep the applique in place for a while, but not permanently. To make it permanent, you have to sew it on.
Use a color thread that you think will compliment the entire applique. I have seen more complex Anavini appliques that change thread, but this was my first one and I just didn't feel like it. I used a zig zag foot which allowed me to see what the heck I was doing as well as a very short zig zag stitch (experiment before actually starting). Then I slowly stitched around the applique. The little curves and feet can be especially tricky, so just go slow and be careful. Remember, slow and steady wins the race! :)
Monday, July 12, 2010
A Pioneer Woman Supper Club
We are in an informal supper club, which consists of four couples who like to cook (girls) and eat (boys and girls). Since we all share the common denominator of being in love with Ree Drummond, her quirky writing style, her fabulous recipes, and her infectious attitude, we decided the theme this month would be...the Pioneer Woman! Denise was hosting this month, so we started out in her kitchen. Here is Denise sampling the cooking and Sarah trying to avoid being photographed! Suckaaaaaa :)

So here's what was on the menu for the night.
Denise delighted us with coq au vin for the main entree, plus wine.
Sarah contributed spinach salad with hot bacon dressing, plus wine.
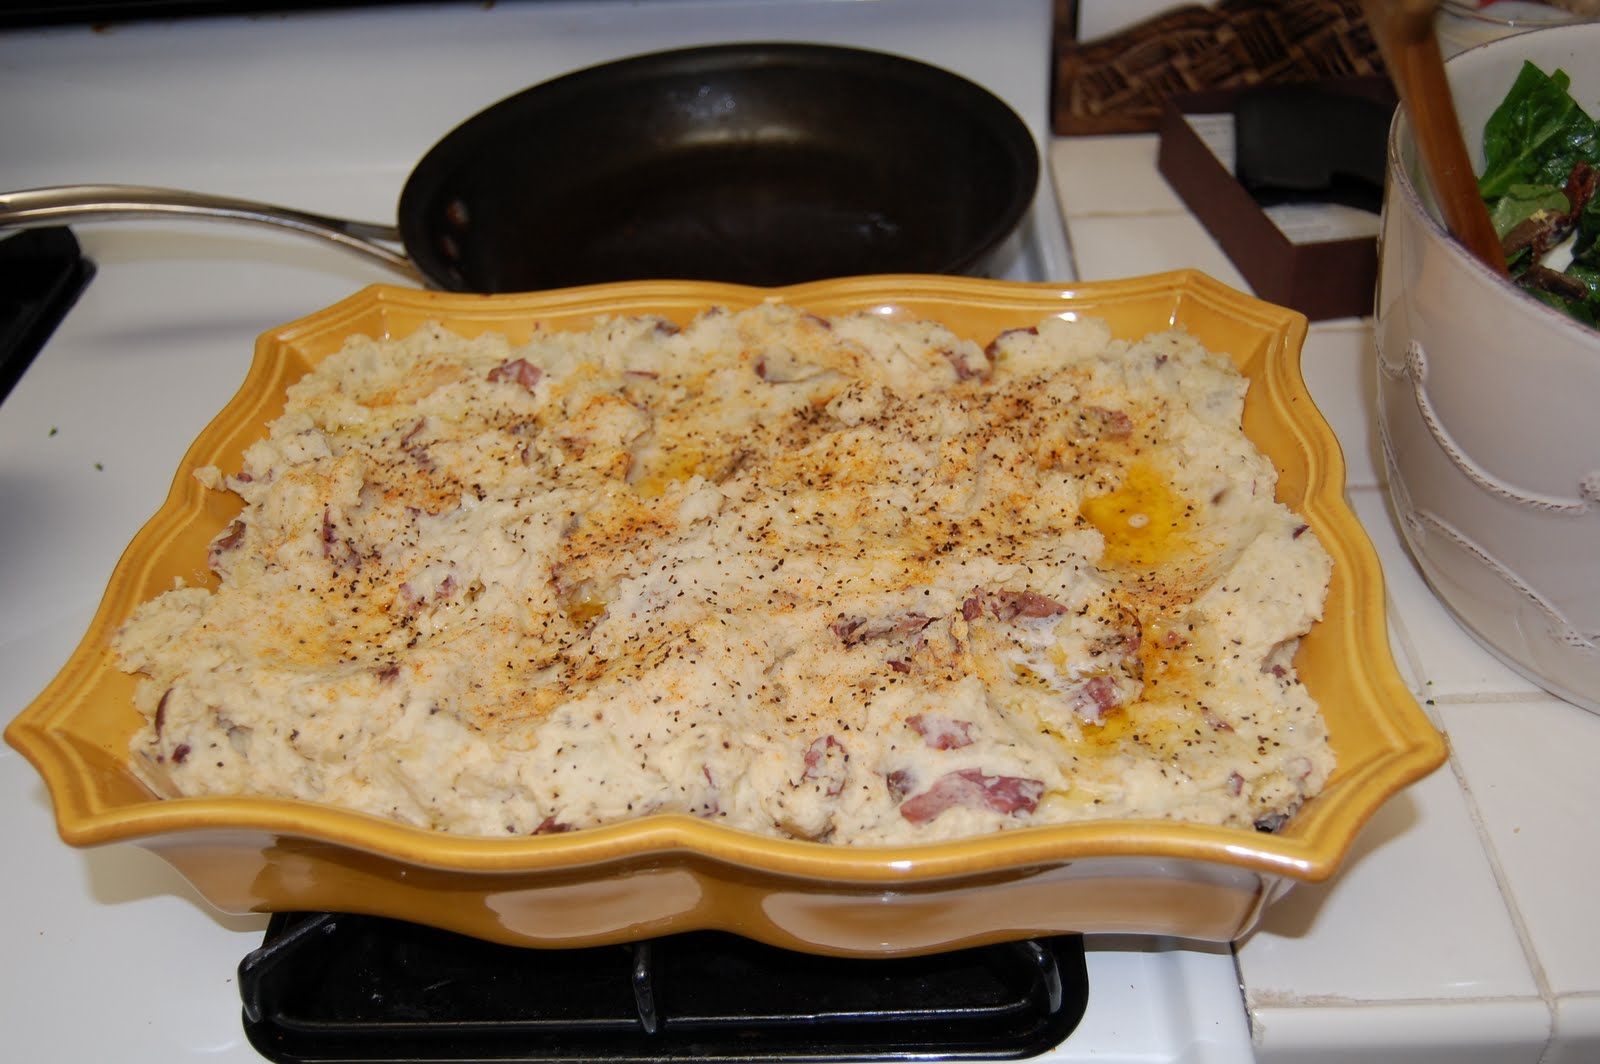
I whipped up some creamy mashed potatoes, plus wine.
Ann made the oreo/peanut butter pie, plus wine.
Are we booze hounds??

Whilst we were slaving away in the kitchen drinking the drink of booze hounds, the boys were relaxing and catching up. Helloooo boys!!!! (They have it so easy)

Because each of us worked hard to bring the Pioneer Woman's individual recipes to life, here's a close up of each. I am adding the links because I know you want to be just like us, and I'm just here to make it a little easier for you.
The spinach salad with hot bacon dressing!!!!!!!!!
http://thepioneerwoman.com/cooking/2009/06/the-best-spinach-salad-ever/

The coq au vin! With noodles!
http://thepioneerwoman.com/cooking/2009/08/coq-au-vin/

The creamy herbed mashed potatoes! I take the easy way and leave the skin on. I think you get more...um, fiber or vitamins that way. The secret ingredient to mashed potatoes is Lawry's seasoned salt...which, I am ashamed to say, I didn't even own when I first made this recipe. Now I quadruple the quantity any time I use a recipe that calls for it!
http://thepioneerwoman.com/cooking/2007/11/delicious_creamy_mashed_potatoes/

The peanut butter pie! As PW says, "If you don’t like peanut butter, step away from this recipe. I’m serious, man. You’re in the wrong place at the wrong time." It was delicious!
http://thepioneerwoman.com/cooking/2009/06/another-pie/

All assembled, the heavenly dinner looked something like this...why is there so much salad?? This must be Sarah's plate!

The happy diners. Can you guess which one is my husband??


I'm not sure where Ann was, but here's the girls!
So here's what was on the menu for the night.
Denise delighted us with coq au vin for the main entree, plus wine.
Sarah contributed spinach salad with hot bacon dressing, plus wine.
I whipped up some creamy mashed potatoes, plus wine.
Ann made the oreo/peanut butter pie, plus wine.
Are we booze hounds??
Whilst we were slaving away in the kitchen drinking the drink of booze hounds, the boys were relaxing and catching up. Helloooo boys!!!! (They have it so easy)
Because each of us worked hard to bring the Pioneer Woman's individual recipes to life, here's a close up of each. I am adding the links because I know you want to be just like us, and I'm just here to make it a little easier for you.
The spinach salad with hot bacon dressing!!!!!!!!!
http://thepioneerwoman.com/cooking/2009/06/the-best-spinach-salad-ever/
The coq au vin! With noodles!
http://thepioneerwoman.com/cooking/2009/08/coq-au-vin/
The creamy herbed mashed potatoes! I take the easy way and leave the skin on. I think you get more...um, fiber or vitamins that way. The secret ingredient to mashed potatoes is Lawry's seasoned salt...which, I am ashamed to say, I didn't even own when I first made this recipe. Now I quadruple the quantity any time I use a recipe that calls for it!
http://thepioneerwoman.com/cooking/2007/11/delicious_creamy_mashed_potatoes/
The peanut butter pie! As PW says, "If you don’t like peanut butter, step away from this recipe. I’m serious, man. You’re in the wrong place at the wrong time." It was delicious!
http://thepioneerwoman.com/cooking/2009/06/another-pie/
All assembled, the heavenly dinner looked something like this...why is there so much salad?? This must be Sarah's plate!
The happy diners. Can you guess which one is my husband??
I'm not sure where Ann was, but here's the girls!
Lengthen those Drapes
My friend Denise bought some incredibly cute drapes at World Market. But given the height of her ceilings, she decided she wanted to add on about 18 inches in brown linen to the bottom of the drapes. I say great idea! It's an inexpensive way to take mainstream drapes and make them custom design and custom length.
Denise had first tried to use what they call hem tape (something like that) but the thickness of the brown material she was trying to add on was really too substantial to be held by tape.
First, I trimmed the width of the brown fabric to correspond with the pre-sewn drapes. Then I ironed. One of the delightful evils of sewing is you always have to have an iron out and ready; it's a necessary evil I must tolerate if I want to sew, and is usually the only time I ever iron my dear husband's shirts.
I hemmed the sides in, then I went for the top. I wanted the unattractive, turned under top of the brown fabric to be hidden.
Then I pinned it to the back of the drape.
Then I sewed that sucker on! Take care to use a thread color that will not show up on front of the fabric. I know there's a way to sew where it won't show, but I haven't figured that out yet. So I just go search for the right thread (HINT: Always pull out the actual thread and lay it across the actual fabric. You'd be surprised how much the color changes from the roll to the individual thread. This is a fool-proof method of getting the right color. You're welcome.)
All that remains was to hem the bottom evenly. Since Denise wanted it as tall as possible, I didn't have to conform to 84 inches, or 96 inches. I just made sure it was even and voila!
Please excuse Wild Thing, he doesn't like to be left out.
Subscribe to:
Posts (Atom)